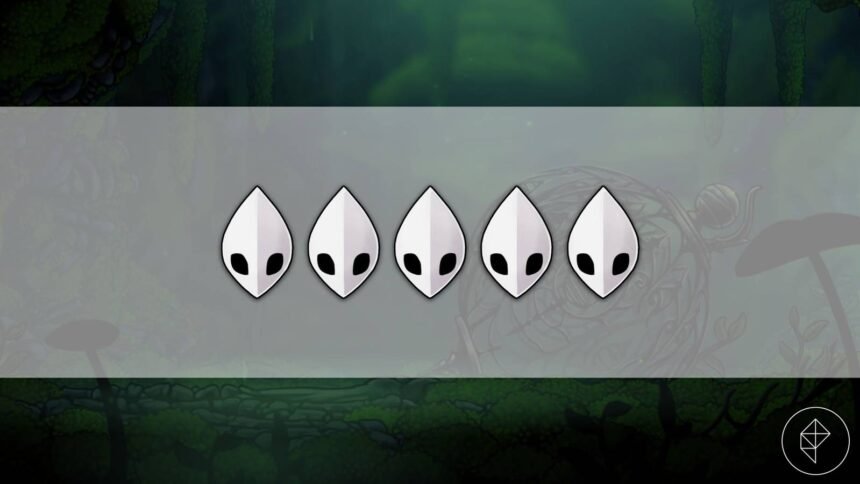
Masks shards improve your well being complete in Hole Knight: Silksong, and, as every little thing does a lot injury, you will undoubtedly wish to get your palms on as many of those shards as doable.
To start with of Silksong, you will shortly encounter enemies that deal two masks of harm in a single hit, which implies you may die in as few as three hits as quickly as you begin the sport. To extend your odds of survival, you want to discover masks shards as quickly as doable, however that’s simpler mentioned than completed. You want 4 masks shards to extend your well being complete by one masks, however the masks shards themselves could be fairly troublesome to trace down.
Here is the place you’ll find all of the masks shards in Hole Knight: Silksong, and in the event you want further assist finding them, take a look at our interactive map.
All Hole Knight: Silksong masks shard areas
There are 20 masks shards so that you can discover in Hole Knight: Silksong, which implies you may improve your complete well being to ten masks. As Silksong is a nonlinear recreation, we have listed out the most definitely order that you’re going to run into every of those masks shards, in addition to every little thing you will must get them.
Masks shard #1 — Bone Backside

The primary masks shard could be bought from Pebb in Bone Backside for 300 rosaries.
Masks shard #2 — Wormways

For this masks shard, you will must unlock the Swift Step capability within the Deep Docks. Afterward, make your technique to the left finish of Mosshome, simply beside the hanging cages. Sprint leap throughout to the opposite facet and dash throughout the lengthy hall with the large acid-spitting bug. Undergo the exit on the left to search out your self at a locked door. Moderately than open it, drop down the opening beneath and break the destructible wall on the fitting. Inside, you will discover a masks shard.
Masks shard #3 — Far Fields

For this masks shard, you will must unlock the Drifter’s Cloak by finishing the “Flexile Spines” quest in Far Fields. Afterwards, head to the fitting of the Seamstress’ home and experience the air currents upward. On this part, you will discover stone platforms with air currents and explosive rocks. Make sure that to hit the explosive rocks to launch extra air currents, and glide your technique to the alternative facet. Head into the room and hit all the explosive rocks inside to disclose a masks shard hidden within the floor.
Masks shard #4 — Shellwood

Ranging from the Shellwood Bellway station, head proper into the following room. The trail downward is break up into two sections: left and proper. Glide over to the trail on the fitting, and you will find an exit straight on the high of the trail. Go inside and use your platforming abilities to pogo your means throughout the enemies and crops forward. On the finish of the trail, you will discover a masks shard.
Masks shard #5 — Deep Docks

You’ve got most likely seen this masks shard as you rode the elevator as much as the bench as quickly as you entered the Deep Docks, however you may solely seize this masks after you have unlocked the Cling Grip capability. This masks shard is discovered within the Deep Docks, however you will really want to start out in The Marrow. Make your technique to the left facet of the underside proper room of The Marrow, however do not drop all the way in which to the underside. As a substitute, take the higher path and proceed to the fitting to discover a vertical wall that you may climb. Leap throughout the platforms to the fitting to enter the Deep Docks, the place you will encounter a gauntlet of enemies. After you defeat them, proceed to the fitting to gather the masks shard.
Masks shard #6 — Weavenest Alta

After unlocking the Needolin, return to the underside proper nook of Moss Grotto to discover a door with a weaver’s face etched onto it. Play your Needolin to unlock the door and head inside. Energy up Weavenest Alta by hitting the 2 silk spools within the far proper room, and return to the glowing platform within the middle of the hallway. In the event you step on it, you will be teleported to the underside of Weavenest Alta. Use Cling Grip to leap up the wall on the fitting and onto the platform to your left. Climb up the open shaft and enter the primary opening in your proper. This may take you to a secret space of Weavenest Alta the place your pogo abilities shall be put to the check.
After you make it previous the lava and pogo problem, you will discover a masks shard within the high left nook of the room.
Masks shard #7 — Cogwork Core

To get this masks shard, you will first must defeat the Cogwork Dancers within the Cogwork Core in Act 2. After you defeat them, drop into the holes beneath and punctiliously descend your means by the spinning cog dying lure. In your means down, search for an exit in your left. This may take you thru extra spinning gears and a gauntlet of robots. After you defeat the waves of enemies, hit the swap on the left and observe the trail upward to discover a masks shard.
Masks shard #8 — First Shrine in Songclave

A masks shard could be bought from Jubliana on the First Shrine in Songclave for 750 rosaries. Nevertheless, to search out Jubliana on the First Shrine, you will first want to finish the “The Wandering Service provider” quest, which is discovered on the wishboard close by. After you full the hunt, she’ll make her technique to the First Shrine and stand beside the wishboard.
Masks Shard #9 — Savage Beastfly Grand Hunt

To unlock this masks shard, you will want to finish the next stipulations:
- “The Threadspun City” quest in Bellhart
- Defeat the Savage Beastfly within the Chapel of the Beast in Hunter’s March
- Defeat the Cogwork Dancers in Cogwork Core
Afterward, return to Bellhart to search out the Savage Beastfly Grand Hunt in your wishboard. You may discover the Savage Beastfly in the identical space you fought towards the Fourth Refrain in Far Fields. After you defeat them, return to the Bellhart wishboard to earn a masks shard as a reward.
Masks shard #10 — Whispering Vaults

Head to the hallway only one layer above the very backside (in the event you’ve gone by the Underworks), to discover a suspicious object hanging from the ceiling. Hit it to launch it, which is able to reveal a gap that you may climb up. As you proceed up, hit the ceiling to push the wood block upward and proceed leaping up the wall. Make your technique to the very high to discover a masks shard.
Masks shard #11 — Far Fields

Within the backside proper area of Far Fields, you will discover a home that appears to be unreachable and some hanging rings. Use your Clawline to grapple to the rings and leap as much as the home. As soon as inside, the doorway behind you’ll collapse, making the opening in entrance of you the one technique to go. Rigorously glide down the opening and keep away from all the spikes till you attain a room with an explosive rock. Earlier than you hit this rock, you need to know that it’ll make the ground disappear and reveal a mattress of lava and two destructible platforms. To make issues worse, you are going to should battle your means by a gauntlet of enemies with solely the 2 platforms and the partitions to help you. We advocate getting the Cogfly so you may concentrate on dodging, and utilizing the Magma Bell simply in case you fall into the lava.
After you efficiently full the gauntlet, the lava will begin to rise and you will have to outrun the lava as you platform your means again to the highest. In the event you fail and perish within the course of, you’ll have to begin over from the start — gauntlet and all. On the high, you will discover a masks shard ready for you.
Masks shard #12 — Mount Fay

The masks shard in Mount Fay could be collected after you unlock the Faydown Cloak on the high of the mountain. Afterward, slide down the snowy mountainside and jump over the spikes till you attain the underside left nook of the realm. On this room, you will discover a hole pillar that you may double leap into, which simply so occurs to include a masks shard.
Masks shard #13 — Blasted Steps

The masks shard within the Blasted Steps would require Clawline and Faydown Cloak. Make your technique to the underside left nook of the Blasted Steps and cease on the final stone platform on the bottom. In the event you see platforms within the air, you have gone too far. From the stone platform, dash leap to the left, use your Clawline midair, and double leap utilizing your Faydown Cloak to achieve the platform above. To succeed in the following platform, you will should do one thing related. Dash leap off, use your Clawline, and glide over to land on the platform.
Proceed upward to enter one other room with extra bugs crawling up and down the partitions, rocks falling from the ceiling, and spikes on the ground. Cautiously navigate your means by the room to discover a masks shard within the high left nook.
Masks shard #14 — Wisp Thicket

For this masks shard, make your technique to the Wisp Thicket, whose entrance is discovered within the high left nook of Greymoor, however first, unlock the Faydown Cloak as you will want double leap to enter the realm and accumulate the masks shard.

After you enter Wisp Thicket, head to the fitting, the place you will discover a bench in a sac hanging from the ceiling. Break open the sac to drop the bench, and relaxation on it simply in case something goes fallacious throughout the upcoming platforming part. Within the subsequent room, pogo off of the hanging crimson balloons and use your Clawline to seize onto the partitions. As you are climbing up the room, take the primary exit on the fitting. On this part, there are just a few fire-spewing enemies, however you may simply pace previous them. Use your Clawline and pogo abilities once more to achieve the tip of the trail the place you will discover a masks shard.
Masks shard #15 — Bilewater

The masks shard in Bilewater can have you platforming over mucky waters filled with disgusting grubs. To make it even worse, the benches in Bilewater are extraordinarily far aside, forcing you to make lengthy treks in the event you do find yourself dying alongside the way in which. To get this masks shard, be sure you have Clawline and Faydown Cloak, as they’re essential to progress additional into Bilewater.
From the Bilewater Bellway, enter the higher exit on the fitting facet and proceed to the fitting till you enter a tall chamber. Double leap up and climb up the wall above. For this part, you will must zigzag your means up, utilizing your Clawline and Faydown Cloak at any time when doable. Alongside the way in which, you will encounter bloatroaches, that are large flying bugs that spew bile at you. Use cowl to attend till they’re completed puking and shortly cross them to keep away from being spit on. Enter the third exit on the fitting and proceed to the fitting within the subsequent room. From right here, you are going to observe the trail to the fitting till you attain the masks shard, however be careful for the slubberlugs within the water as they will leap out as you are passing by and drag you into the grub-infested waters.
Masks shard #16 — The Slab
Earlier than you head to The Slab, you will must seize the Key of Apostate, which is situated within the Putrified Ducts. The important thing could be discovered within the backside left nook of the realm, as seen within the picture beneath:

Now that you’ve the important thing, head to The Slab by the Choral Chambers entrance. If you have not been to The Slab earlier than, we advocate progressing by the realm and amassing the Key of Indolent and the Key of Heretic to unlock gates alongside the way in which. As soon as you have completed that, head to the highest of the central chamber and unlock the door on the fitting with the Key of Apostate.
On this room, you are going to must put your pogo abilities to the check as you will be pogoing off a transferring gear. You may must observe the gear all the way in which to the highest the place you will discover a masks shard within the high left nook. In the event you lose observe of the gear or it strikes out of vary, you’ll sadly want to start out over from the very starting.
Masks shard #17 — ‘Quickest in Pharloom’ want in Far Fields (Act 3)
To get this masks shard, you will want to start out Act 3. Head to the highest proper nook of Far Fields by going by the key space, which could be accessed through the use of Silk Soar in entrance of the statue in Hunter’s March.

When you make it to the highest proper nook, you will discover Sprintmaster Swift, and he’ll problem you to see who’s the quickest in all of Pharloom. You may must win three races, with the issue getting tougher after every race. We advocate utilizing your entire speed-boosting instruments, just like the Silkspeed Anklets and Flea Brew to provide you that further oomph. After you beat Swift 3 times, you will get a masks shard as a reward.
Masks shard #18 — ‘Darkish Hearts’ want in Bellhart (Act 3)

Head to the Bellhart want board in Act 3 to search out the hunt referred to as “Darkish Hearts.” For this want, you want to destroy 12 void lots all through all of Pharloom. Void lots appear to be a clump of enemies held collectively by void strings. As a reference, this is a picture of a void mass in Shellwood:

Fortunately, there are greater than 12 void lots scattered across the map, and you may naturally run into plenty of them as you discover Act 3. In the event you’re in search of extra void mass areas, contemplate testing our interactive map, which has all the void mass areas marked for you.
After you defeat 12 void lots, flip within the want to obtain your masks shard.
Masks shard #19 — Mount Fay (Act 3)

To get the Act 3 masks shard in Mount Fay, you will want to make use of Silk Soar to achieve a secret space. Climb Mount Fay till you attain the hallway within the middle of the map.

Through the portion the place you want to use your Clawline to grapple onto the flying crystal bugs, you will land on a small platform within the water. Use Silk Soar to go up the opening within the ceiling and observe the trail to the fitting. Break by the ice to make it to the underside proper nook of the room, and use Silk Soar once more to achieve the exit within the high proper nook. Enter the hidden cave to search out your self in one other troublesome platforming problem.
To succeed in the highest and accumulate the masks shard, you will want to make use of your Clawline to its most potential by hooking onto the mnemonords, that are large variations of the flying crystal bugs that you’ve got seen round Mount Fay. You may additionally must hook onto the partitions and stand on ice crystals to provide your self a lift. As soon as you have made it to the highest, use Silk Soar once more to search out the masks shard.
Masks shard #20 — ‘The Hidden Hunter’ want in Bellhart (Act 3)
For the final masks shard, you will want to simply accept the “The Hidden Hunter” quest on the want board in Bellhart in Act 3. On this quest, you will want to trace down Gurr the Outcast and defeat them.

Moderately than have you ever observe down Gurr and take care of all the traps they left behind, head over to the far proper part of Far Fields, simply earlier than the realm with Sprintmaster Swift. On this location, you will discover the Gurr’s final tracks, and in the event you work together with it, you will be trapped within a cage and dragged down into an area with Gurr. As you may already inform, Gurr loves traps and this battle primarily focuses round Gurr throwing the traps you have seen alongside the way in which and some spikes coming out of the bottom. To simply defeat Gurr, await them to land on the bottom after they’ve thrown their traps and land just a few hits.
When you defeat Gurr, head into the room on the left and accumulate the Grass Doll within the high left nook, however be careful for the lure within the high left nook. There’s a platform that may activate a swinging axe in the event you step on it, so be fast or leap over it. Deliver the Grass Doll again to the want board to gather your masks shard.
Searching for extra Silksong assist? Try our important newbie suggestions and high rosary bead farming areas in the event you’re simply getting began, and in the event you’re working up towards just a few locked doorways, our easy key areas information is the one for you.
When you’re exploring and finishing quests just like the “Nice Style of Pharloom,” “Broodfeast,” or the “Silver Bells” request, be sure that to spend a while progressing the principle story as effectively, as you will get some upgrades that make battles simpler. After “The Threadspun City” quest, for example, you may improve your needle to deal extra injury and improve it once more when you get Pale Oil later within the recreation.