In Donkey Kong Bananza, you’ll hit the Radiance Layer as your twelfth zone. It’s one other massive space crammed with Banandium Gems. A number of the sublayers solely have a couple of bananas, so don’t fret an excessive amount of whenever you see that this place has a whopping 5 sublayers.
The Radiance Layer is residence to snake folks and it’s the place you’ll get your final Historical Bananza Energy: Snake Bananza. You’ll have to leap up excessive utilizing your coiled physique to unravel a ton of the puzzles on these flooring, whereas additionally using a few of your older Bananza skills, too.
Beneath, we checklist the place to search out the entire Banandium Gems within the Radiance Layer we’ve discovered thus far in Donkey Kong Bananza. We’re nonetheless updating this information with extra golden bananas as we discover them.
Sublayer 1200 Banandium Gems
We’ve discovered three Banandium Gems in Sublayer 1200 within the Radiance Layer.
#1: Beneath the White-Sand Touchdown

Graphic: Julia Lee/gamexplore | Supply photographs: Nintendo EPD/Nintendo through gamexplore
Proper subsequent to the Shedlight Cave teeleport spot start digging down and also you’ll discover this banana. You need to use DK’s Hand Slap sonar to assist find the banana.
#2: Alighted within the Radiance Layer!

Graphic: Julia Lee/gamexplore | Supply photographs: Nintendo EPD/Nintendo through gamexplore
These three bananas might be sitting within the snow whenever you first drop into the Radiance Layer.
#3: Deep Down in Shedlight Cave

Graphic: Julia Lee/gamexplore | Supply photographs: Nintendo EPD/Nintendo through gamexplore
Previous the outlet right down to the subsequent sublayer is one other concrete pillar. Destroying it creates a gap for mild to shine down and digging instantly down within the mild will result in this banana.
Remodel into Kong Bananza and destroy the concrete flooring beneath the concrete pillar to search out the banana.
Sublayer 1201 Banandium Gems
We’ve discovered 18 Banandium Gems in Sublayer 1201 within the Radiance Layer.
#4: Ssslithered Previous Shedlight Cave!

Graphic: Julia Lee/gamexplore | Supply photographs: Nintendo EPD/Nintendo through gamexplore
You get this banana as a part of the story whenever you drop on to Sublayer 1201.
#5: Shifty Smash: A Thorny State of affairs

Graphic: Julia Lee/gamexplore | Supply photographs: Nintendo EPD/Nintendo through gamexplore
From the place you land on Sublayer 1201, go to your left and soar from the sting. Beneath, you discover a cave and within it a Shifty Smash problem. Full it to earn this banana.

Graphic: Julia Lee/gamexplore | Supply photographs: Nintendo EPD/Nintendo through gamexplore
When you flip the solar again on in Sublayer 1202, head to the Glowboa Grotto Getaway and observe the trail behind the getaway. Punch down on the light-activated door to search out this banana.
#7: Revealed by the Gentle

Graphic: Julia Lee/gamexplore | Supply photographs: Nintendo EPD/Nintendo through gamexplore
This banana is correct subsequent to the Glow Stone Vein tuning fork and will be discovered with DK’s Hand Slap sonar. It’s behind a wall that two snakes try to interrupt, however they complain about not with the ability to see. Pull the fabric from the glowing vein close by after which deliver it to the blue coil to open the door and declare your banana.
#8: Glowing Fruit within the Darkness


1/2Graphic: Julia Lee/gamexplore | Supply photographs: Nintendo EPD/Nintendo through gamexplore
This banana is contained in the Radiance Layer Problem Course, Dim Lights within the Darkness. To seek out its entrance, begin from the Glow Stone Vein tuning fork and soar from the platform to your left to the decrease half. The door to this problem is underneath the bridge. This banana is positioned in plain sight after the primary set of platforms.
#9: Sharp Eye for a Banana

Graphic: Julia Lee/gamexplore | Supply photographs: Nintendo EPD/Nintendo through gamexplore
Through the problem, when on the platform with the crockoid, seize a chunk of the glowing stone and throw it at a coil to the left of the platform. It can make two platforms seem, one among them containing this banana.
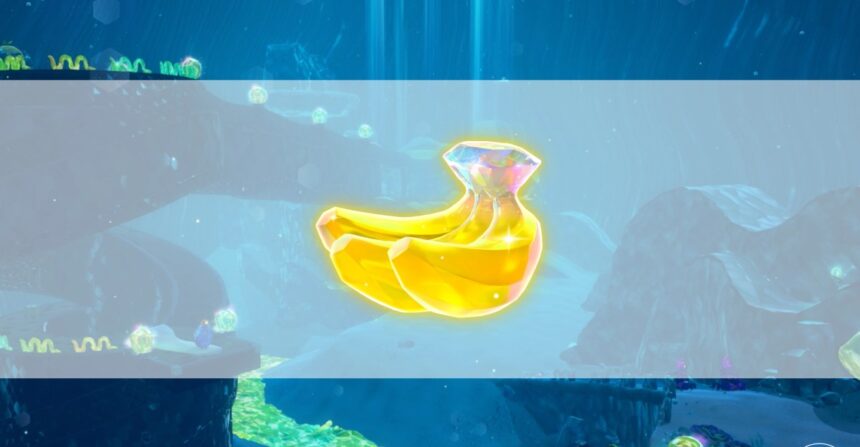
#10: Guided by Glowing Fruit

Picture: Nintendo EPD/Nintendo through gamexplore
End the Radiance Layer Problem Course 2 to search out this banana.
#11: Adrift in Glowboa Grotto

Graphic: Johnny Yu/gamexplore | Supply photographs: Nintendo EPD/Nintendo through gamexplore
From the Glow Stone Vein tuning fork, stroll down the hill and switch to the correct. Throughout the glow stone lake, you’ll spot the tip of a Banandium Gem protruding of a pile of sand.
#12: Battle: Some Gentle Smashing

Graphic: Julia Lee/gamexplore | Supply photographs: Nintendo EPD/Nintendo through gamexplore
You earn this banana after finishing a battle problem. You discover this problem by happening the hill from the Glow Stone Vein tuning fork and going to your left. There’s a wall with a gap there. Inside, you’ll be able to discuss to a Constructone and pay 600 gold to open the trail to the problem.
#13: Sitting on a Snake’s Head

Graphic: Julia Lee/gamexplore | Supply photographs: Nintendo EPD/Nintendo through gamexplore
Use Snake Bananaza’s cost soar to land on prime of the large snake hallway’s head to get this banana.
#14: Over the Elder’s Head

Graphic: Johnny Yu/gamexplore | Supply photographs: Nintendo EPD/Nintendo through gamexplore
This banana is discovered on prime of the zipline platform positioned above the Snake Elder. To succeed in the banana, go on prime of the hill above the Elder’s Again Getaway and remodel into your snake kind. Do a cost soar into the air and shortly remodel into your ostrich kind, gliding the remainder of the way in which.
#15: Bathing within the Essence of the Solar

Graphic: Johnny Yu/gamexplore | Supply photographs: Nintendo EPD/Nintendo through gamexplore
Head into the room to the left of the Snake Elder, which is the place you discovered one of many 4 report items. On the very first platform inside, you’ll discover a big spider-like enemy on prime of a mattress of lava. Remodel into your elephant kind and suck up the lava to disclose a hidden room that accommodates a banana. Defeat the enemy by destroying the concrete on prime of it and gather your banana.
#16: Atop an Unlit Touchdown

Graphic: Julia Lee/gamexplore | Supply photographs: Nintendo EPD/Nintendo through gamexplore
Whereas ziplining to obtain the piece of the traditional report behind the Snake Elder, you’ll run right into a section the place you need to continually swap ziplines to make it to mentioned report. Close to the center of this section, you’ll see this banana subsequent to the far proper zipline.
#17: Sneaky Room underneath Sand


1/2Graphic: Julia Lee/gamexplore | Supply photographs: Nintendo EPD/Nintendo through gamexplore
That is the primary banana within the problem course Snake Bananza: Charged Climb, which you’ll be able to attain from the highest of the snake construction. Because the identify implies, you’ll should be utilizing Snake Bananza to begin this course.
As you’re making your manner by the problem be looking out for a patch of snow on the bottom. You may dig down by it and discover this banana.
#18: Springing off Sandy Steps

Picture: Nintendo EPD/Nintendo through gamexplore
In above problem course, when you discovered the earlier banana, this banana might be proper after it as quickly as you’re taking the barrel.
#19: Swift and Stunning Ascent

Picture: Nintendo EPD/Nintendo through gamexplore
This banana is the end-of-course reward for the above problem course.
#20: The View Past Glowboa Grotto

Graphic: Julia Lee/gamexplore | Supply photographs: Nintendo EPD/Nintendo through gamexplore
After you flip the solar again on in Sublayer 1202, use Ostritch Bananza to glide (actually requiring the Glide ability) to this opening from the highest of the Constrictor Hall. Comply with the trail to search out this banana.
These bananas are skipped on the gathering display, that means that they might require you to beat the sport to unlock. We’ll replace this information as soon as we will verify how one can get these bananas.
#30: Radiance Chip Alternate

Graphic: Julia Lee/gamexplore | Supply photographs: Nintendo EPD/Nintendo through gamexplore
In Sublayer 1202, you’ll discover the Radiance Layer’s chip alternate within the preliminary hub space. You may get this banana early by exchanging your chips to the concierge NPC at a getaway as an alternative.
Sublayer 1202 Banandium Gems
We’ve discovered 15 Banandium Gems in Sublayer 1202 within the Radiance Layer.
#31: Unveiled within the Sculptors’ Studio!

Graphic: Julia Lee/gamexplore | Supply photographs: Nintendo EPD/Nintendo through gamexplore
That is one other story-based banana that you just’ll get for dropping onto the sublayer for the primary time.
#32: Battle: Shining By way of

Graphic: Julia Lee/gamexplore | Supply photographs: Nintendo EPD/Nintendo through gamexplore
After turning the solar again on, you’ll be able to head again to the little city hub space and break this door open to unlock this fight problem.
#33: Ceiling Swingin’ Snack

Graphic: Johnny Yu/gamexplore | Supply photographs: Nintendo EPD/Nintendo through gamexplore
After you teeleport to Sculptors’ Studio in Sublayer 1202, flip to the correct to discover a snake in entrance of a big crystal. Break the crystal and fall into the outlet to discover a Fractone and climbable ceiling grates. Remodel into your snake kind and cost soar to the ceiling. Make your away throughout the grates and drop onto the banana behind the fence to gather it.
#34: Staying Contemporary within the Storeroom

Graphic: Johnny Yu/gamexplore | Supply photographs: Nintendo EPD/Nintendo through gamexplore
After you’ve turned on the artificial solar, return to the Sculptors’ Studio waypoint. Punch by the shining door positioned behind the waypoint and observe the trail to discover a banana.
#35: Battle: Dive-Bombing Run

Graphic: Johnny Yu/gamexplore | Supply photographs: Nintendo EPD/Nintendo through gamexplore
When dealing with the Chip Alternate in Sublayer 1202, flip to the left and look as much as spot a floating island with a battle problem on it. Remodel into your snake kind and cost soar onto the island. Head inside to search out three trapantuloids and a bunch of liftoff ore. You may both use the liftoff ore or flip right into a snake to get on prime of every enemy. Break by the liftoff ore on prime of every trapantuloids to finish the problem.
#36: Completely Preserved in Crystal

Graphic: Julia Lee/gamexplore | Supply photographs: Nintendo EPD/Nintendo through gamexplore
This banana is encased in crystal behind the storeroom that contained banana #34.
#37: Shifty Smash: A Darkish Climb

Graphic: Johnny Yu/gamexplore | Supply photographs: Nintendo EPD/Nintendo through gamexplore
After you’ve turned on the artificial solar, drop right down to the underside of the Sculptors’ Studio to search out the lit up door. Head inside to discover a shifty triangle, however earlier than you begin, be certain to replenish your bananergy by hitting the close by melon. Remodel into your snake kind and hit the problem to begin it. Cost soar your solution to the highest and destroy the block to get your banana.
#38: Soaking within the Essence of the Solar

Graphic: Johnny Yu/gamexplore | Supply photographs: Nintendo EPD/Nintendo through gamexplore
After you soar off Sculptor’ Studio and enter the tower, head in the direction of the small lava pool the place the flaming barrels are touchdown. Suck up the lava in your elephant kind to discover a banana hidden beneath.
#39: Warmed by Flaming Barrels

Graphic: Julia Lee/gamexplore | Supply photographs: Nintendo EPD/Nintendo through gamexplore
As you climb up the primary a part of the barrel wall, look to the correct to see this banana hanging alongside the trail the place the primary barrel drops.
#40: Protected within the Barrel-Free Zone

Graphic: Julia Lee/gamexplore | Supply photographs: Nintendo EPD/Nintendo through gamexplore
This banana is partially coated by a wall the place two barrels roll down on both sides. Use Snake Bananza’s glare skill to decelerate the barrels to fastidiously previous them to this banana.
#41: Summitted the Photo voltaic Management Tower!

Graphic: Julia Lee/gamexplore | Supply photographs: Nintendo EPD/Nintendo through gamexplore
You’ll seize this banana as a part of the story. When you end turning the solar lamp again on, open the door with the sunshine shining out of it to entry this banana by the tuning fork.
#42: Hidden within the Girders


1/2Graphic: Julia Lee/gamexplore | Supply photographs: Nintendo EPD/Nintendo through gamexplore
Within the Historical Nation problem course, about midway by the problem you’ll discover a platform of dust that doesn’t have the slap indicator on it. Slapping right here raises the platform and you’ll find this banana.
#43: Jumpin’ like Jumpman

Picture: Nintendo EPD/Nintendo through gamexplore
This banana reveals up just a little over midway by the Historical Nation problem.
#44: Climbing to a Excessive Rating

Picture: Nintendo EPD/Nintendo through gamexplore
That is the final banana rewarded for finishing the Historical Nation problem.
#45: Hoping on a Artificial Solar

Graphic: Johnny Yu/gamexplore | Supply photographs: Nintendo EPD/Nintendo through gamexplore
After you permit the Photo voltaic Management Tower, flip round to face the constructing’s snake-like head. Remodel into your snake kind and cost soar onto the roof. Preserve strolling forward to discover a banana on prime.
Sublayer 1203 Banandium Gems
We’ve discovered 26 Banandium Gems in Sublayer 1203 within the Radiance Layer.
#46: Settled Upon Serpent Sands!

Graphic: Julia Lee/gamexplore | Supply photographs: Nintendo EPD/Nintendo through gamexplore
You get this banana as a part of the story whenever you drop right down to this sublayer for the primary time.
#47: Balloons underneath the Dunes
1/5Graphic: Johnny Yu/gamexplore | Supply photographs: Nintendo EPD/Nintendo through gamexplore
For this banana, you’ll have to pop 5 balloons discovered underneath the start line in Sublayer 1203.
The primary two will be present in trapantuloids on the underside flooring. Both chunk soar or cost soar in snake kind to land on prime of them and punch downwards to defeat them. The remainder of the balloons will be discovered on the second degree, so make your manner as much as the upper platforms.
The third balloon will be present in a trapantuloid underneath a thorny roof. Remodel into your elephant kind and suck up the entire thorns to defeat the trapantuloid and gather the balloon.
The fourth balloon is in a trapantuloid hiding behind an ice and concrete wall, so be ready for a soar scare!
The fifth balloon is hidden inside a darkish hallway, whose entrance is lit up by the glow stone ore. Head inside to search out one other trapantuloid and convey them underneath the daylight in the midst of the world to stun them. Leap on prime and punch downwards to defeat them. After you bought all 5 balloons, return to the center of the underside flooring to gather your banana.
#48: Obssscured in a Dune Cave Nook

Graphic: Johnny Yu/gamexplore | Supply photographs: Nintendo EPD/Nintendo through gamexplore
On the second degree of the dune beneath the start line in Sublayer 1203, you’ll discover a hallway stuffed with thorns together with a trapantuloid inside. Remodel into your elephant kind and suck up the thorns to simply defeat the enemy. Beneath the place the trapantuloid was, you’ll discover a patch of glow stone. Break it and drop into the outlet to discover a banana hiding inside.
#49: Deep in a Dune Cave Hallway

Graphic: Johnny Yu/gamexplore | Supply photographs: Nintendo EPD/Nintendo through gamexplore
After you drop into the dune beneath the start line, climb up the snowy path into the outlet within the wall to search out this banana.
#50: Bloomed within the Radiance Layer

Graphic: Julia Lee/gamexplore | Supply photographs: Nintendo EPD/Nintendo through gamexplore
Use Kong Bananza to interrupt the concrete round this flower so it’ll bloom. As soon as it does, discuss to it to get the banana.
#51: Battle: Shadows and Daylight

Graphic: Julia Lee/gamexplore | Supply photographs: Nintendo EPD/Nintendo through gamexplore
Break by the enamel of the Void Kong sculpture to drop on this fight problem. When you’re within the problem, lure the purple scorpions into the sunshine and the purple scorpions out of the sunshine, punch them, after which declare your banana.
#52: Shifty Smash: Timing is Every little thing

Graphic: Julia Lee/gamexplore | Supply photographs: Nintendo EPD/Nintendo through gamexplore
Hit the shifty triangle to begin the problem, after which use Snake Bananza to carry out a well-timed cost soar by all 4 shifty squares directly to get this banana.
#53: Radiance Fragmentone Restoration

Graphic: Julia Lee/gamexplore | Supply photographs: Nintendo EPD/Nintendo through gamexplore
Dig down on this snake sculpture’s mouth to drop onto a Fragmentone that wants your assist. You simply have to escort the fragments again alongside this path at nighttime, so seize a piece of the close by glow stone to mild the trail. The one massive impediment are transferring partitions that may push the fragments off, so transfer shortly previous them. You’ll get this banana for bringing again one fragment to the Fragmentone.
#54: Radiance Fragmentone Restoration
You’ll get this banana for bringing again all three fragments to the Fragmentone.
#55: Battle: Vaulting Virtuoso

Graphic: Julia Lee/gamexplore | Supply photographs: Nintendo EPD/Nintendo through gamexplore
Leap into this gap after which dig previous the sand by the snake that claims, “Digging by sand is sssimple!” Preserve punching ahead (utilizing your Hand Slap sonar when you really feel like chances are you’ll get misplaced) in the direction of a battle problem portal. When you arrive, use your Snake Bananza, enter, and take out the 2 molevoloids to get your banana.
#56: Radiance Smashin’ Stats

Graphic: Julia Lee/gamexplore | Supply photographs: Nintendo EPD/Nintendo through gamexplore
Leap into this gap and observe the trail to search out our buddy Smashintone, who gives you a banana when you’ve smashed 70,000 cubic meters of crystal within the layer. Remember the fact that crystal is the glass-looking terrain you’ll find across the Window Viper, not the ice-like stuff that the snake sculptures are fabricated from (that’s really technically stone).


1/2Graphic: Julia Lee/gamexplore | Supply photographs: Nintendo EPD/Nintendo through gamexplore
Drop into this gap throughout from the blocked-off ruins to search out the Constructone who will open up the ruins in alternate for 1,000 gold. These ruins are difficult, as you’ll have to Turf Surf utilizing the our bodies of the gloominoids, however since their structural integrity worsens so closely in daylight, you’ll wish to keep away from the solar as a lot as doable when skating by.
To get this banana, surf straight down in the direction of the checkpoint. Drop down and choose up an illumoid (the purple scorpions which might be strengthened by daylight). Flip round and punctiliously surf again up the skinny path on the aspect, ensuring to remain within the solar this time, to search out your banana.
#58: Shadow-Path Relaxation Cease

Picture: Nintendo EPD/Nintendo through gamexplore
This banana is on the midway level for the above problem course.
#59: Shadow-Path End Line

Picture: Nintendo EPD/Nintendo through gamexplore
This banana is the standard end-of-course reward by the exit barrel.
#60: Tip o’ The Stone Snake’s Tongue

Graphic: Julia Lee/gamexplore | Supply photographs: Nintendo EPD/Nintendo through gamexplore
This banana will initially be coated by void goop. Comply with the trail of the void stuff into the snake sculpture’s mouth, punching till you discover the supply of the purple goop. Break it after which you’ll be able to break the banana freely.
#61: Hanging Out beneath the Oasis

Graphic: Julia Lee/gamexplore | Supply photographs: Nintendo EPD/Nintendo through gamexplore
This banana is in a lava-filled cave underneath the oasis, because the identify implies. Use Elephant Bananza to suck up the lava beneath the banana after which use Snake Bananza to cost soar into it.
#62: The Radiance Growtone

Graphic: Julia Lee/gamexplore | Supply photographs: Nintendo EPD/Nintendo through gamexplore
Feed the massive and grasping Growtone gold to get this primary banana.
#63: The Hungry Radiance Growtone
Feed the Growtone extra gold to get this second banana.
#64: The Sated Radiance Growtone
Feed the Growtone even extra gold (4,000 complete) to get this third and closing banana.
#65: Grown beneath the Growtone

Graphic: Julia Lee/gamexplore | Supply photographs: Nintendo EPD/Nintendo through gamexplore
Proper underneath the Growtone, there’s a banana caught within the ceiling. Use Snake Bananza’s cost soar, but additionally punch upwards on the prime of the soar to interrupt this banana.
#66: Cranky’s Radiance Rant

Graphic: Julia Lee/gamexplore | Supply photographs: Nintendo EPD/Nintendo through gamexplore
Cranky and Rambi are standing on the highest of snake-shaped sculptures by the oasis. Simply climb up and discuss to the outdated monkey to get your banana.
#67: Beneath the Viper’s Chinny-Chin-Chin

Graphic: Julia Lee/gamexplore | Supply photographs: Nintendo EPD/Nintendo through gamexplore
This banana is virtually proper underneath the Window Viper tuning fork. Use the viper’s “tongue” to climb round to the banana, which is dangling from a roof highway that you need to use.
#68: Battle: Open the Window

Graphic: Julia Lee/gamexplore | Supply photographs: Nintendo EPD/Nintendo through gamexplore
Break open the cracked wall to search out and full this fight problem in your banana. You’ll have to defeat 5 crockoids that need to be uncovered to mild first to win.
#69: Head within the Shade Clouds

Graphic: Julia Lee/gamexplore | Supply photographs: Nintendo EPD/Nintendo through gamexplore
Use Snake Bananza to cost soar up this construction to get your banana.
#70: Pillaged from a Shade-Cloud Pillar

Graphic: Julia Lee/gamexplore | Supply photographs: Nintendo EPD/Nintendo through gamexplore
Use Snake Bananza to cost soar as much as the climbable a part of the second tower among the many shaded clouds. From the climbable half, cost soar once more up on prime of the tower and punch the sunshine door right down to drop instantly on this banana.
#71: Walkin’ on Shade Clouds

Graphic: Julia Lee/gamexplore | Supply photographs: Nintendo EPD/Nintendo through gamexplore
From closing platform with a tower on it, fastidiously choose up a piece and throw it in the direction of the lamp. It could take a couple of tries, because it’s thus far, so ready to intention upwards a bit. When you hit it, the trail to this banana will turn out to be shaded, permitting you to stroll on it.
Sublayer 1204 Banandium Gems
We’ve discovered 5 Banandium Gems in Sublayer 1204 within the Radiance Layer.
#72: Crashed the Crystal-Cobra Den!

Graphic: Julia Lee/gamexplore | Supply photographs: Nintendo EPD/Nintendo through gamexplore
You get this banana as a part of the story whenever you drop right down to this sublayer for the primary time.
#73: Hidden within the Shifting Wall


1/2Graphic: Julia Lee/gamexplore | Supply photographs: Nintendo EPD/Nintendo through gamexplore
This banana is hidden within the Robust, Shady Clouds Historical Ruins simply alongside the wall of this small sublayer. This whole degree requires you to journey within the shadows of thorn partitions and break mentioned partitions sometimes to create paths ahead.
To get this banana, you’ll wish to take a left path reasonably than the correct path in the direction of the banana within the open. Following the left will lead you to an enormous wall with thorns in it. Use the ice balls being thrown by the buzzoids to interrupt the thorns open and declare your banana.
#74: Sticking to the Shadows

Picture: Nintendo EPD/Nintendo through gamexplore
This banana is a reward for making it to the midway level of the above historic ruins.
#75: By way of Shadows and Thorns

Picture: Nintendo EPD/Nintendo through gamexplore
That is the standard end-of-challenge banana hanging out by the barrel of the above ruins.
#76: Swallowed by the Snake

Graphic: Julia Lee/gamexplore | Supply photographs: Nintendo EPD/Nintendo through gamexplore
This banana is within the physique of a crystal snake by the getaway on this sublayer. Smash the snakes physique open to seize the banana.
Monkeying round in Donkey Kong Bananaza? We now have guides that can assist you plow by this collectathon, together with the place to search out Banandium Gems on Resort Layer, Tempest Layer, and Landfill Layer. We even have guides on how one can unlock music discs and explainers on the assorted Historical Bananza Powers and the ability tree.