Banandium Gems are golden bananas scattered across the layers in Donkey Kong Bananza. You’ll discover dozens of those collectibles within the Lagoon Layer.
The Lagoon Layer is dwelling to, effectively, a lagoon, and to the sensible Kong Elder. A few of the Banandium Gems within the this layer would require you to regulate the water stage of the lagoon and make the most of your Kong Bananza powers. The Lagoon Layer is claimed to have 55 Banandium Gems within the assortment menu, however a bit of them can’t be discovered till you progress additional into the sport. These Banandium Gems will be pretty troublesome to seek out — some are hidden inside Historical Ruins, whereas others require you to assume in your ft.
Beneath, we record the place to seek out the entire Banandium Gems within the Lagoon Layer we’ve discovered up to now in Donkey Kong Bananza. We’re nonetheless updating this information and can add extra golden bananas as we discover them.
Lagoon Layer Sublayer 100 Banandium Gems
We’ve discovered 23 Banandium Gems in Sublayer 100 of the Lagoon layer.
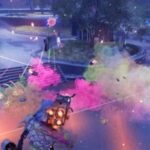
#1: First Crockoid Cracked!

Graphic: Johnny Yu/gamexplore | Supply photos: Nintendo EPD/Nintendo through gamexplore
The primary Banandium Gem will seem instantly in entrance of you if you first land within the sublayer.

Graphic: Johnny Yu/gamexplore | Supply photos: Nintendo EPD/Nintendo through gamexplore
From the place to begin, stroll ahead alongside the correct edge till you run right into a wall. Jump over the wall and drop down. Within the middle of the realm, you’ll discover a tender dust wall. Punch by way of the wall and head inside to seek out the second Banandium Gem.
The third Banandium Gem is left out within the assortment, so we consider that you simply’ll must return after you’ve progressed additional or after you’ve crushed the principle story of Donkey Kong Bananza.

Graphic: Johnny Yu/gamexplore | Supply photos: Nintendo EPD/Nintendo through gamexplore
Comply with the street from the Reservoir Financial institution tuning fork. Look as much as your proper round midway down the trail and also you’ll see a mud wall. Smash by way of it, drop into some water, and smash the gem.
#5: Shifty Smash: Past the Wall

Graphic: Johnny Yu/gamexplore | Supply photos: Nintendo EPD/Nintendo through gamexplore
Comply with the street from the Reservoir Financial institution tuning fork, and as a substitute of turning left towards the rotating concrete doorways, climb the grassy cliffs. On the opposite aspect, above the doorway to Sublayer 101, you’ll see a shifty triangle, which appears to be like like shiny silver pyramid. Break the triangle to begin a timed occasion the place you have to demolish a dice on the opposite aspect of the cliff in 20 seconds. Try this, and the Banandium Gem will seem.
To simply full this problem, we suggest breaking the wall behind the triangle earlier than you even begin the problem. After you begin the problem, break off a bit of the bomb rock and throw it on the shifty dice to complete the problem.
#6: Battle: Stoney, Grassy Goons

Graphic: Johnny Yu/gamexplore | Supply photos: Nintendo EPD/Nintendo through gamexplore
Comply with the principle strolling path that begins on the Reservoir Financial institution tuning fork. You’ll discover an Historical Rune entrance on the correct, containing a battle in opposition to three Crockoids. Defeat them to get the gem.
#7: A Nook behind Concrete

Graphic: Johnny Yu/gamexplore | Supply photos: Nintendo EPD/Nintendo through gamexplore
Between the rotating concrete partitions and the waterfall on the opposite aspect is a small concrete panel with gold sparks coming off it. Throw a bomb rock at it to shatter the panel, and the Gem is in a distinct segment behind it.
#8: Battle: Each Sides of the Bridge

Graphic: Johnny Yu/gamexplore | Supply photos: Nintendo EPD/Nintendo through gamexplore
This gem will be obtained within the Historical Damage subsequent to the Reservoir Hills tuning fork. Defeat six Antickoids to get it.
#9: Smash By the Flooring

Graphic: Johnny Yu/gamexplore | Supply photos: Nintendo EPD/Nintendo through gamexplore
You’ll discover a large cave formed like a monkey head behind the large waterfall within the middle of the map. Go inside, climb the ceiling, and punch the enemy when it’s proper above the destructible ground spot. Leap into the cave inside to get the gem.
#10: Cranky’s Lagoon Rant

Graphic: Johnny Yu/gamexplore | Supply photos: Nintendo EPD/Nintendo through gamexplore
Behind the large cave formed like a monkey head within the middle of the map, you’ll discover Rambi the rhinoceros. Toss stone chunks on the shifty objects floating close to him to type platforms. Leap on them till you attain Cranky Kong and discuss to him to get the tenth Banandium Gem.

Graphic: Johnny Yu/gamexplore | Supply photos: Nintendo EPD/Nintendo through gamexplore
Go to the mouth of the monkey head-shaped cliff behind the large central waterfall. Punch into the dust floor to discover a gem.
#12: Relaxation Cease on Roof Street


1/2Graphic: Johnny Yu/gamexplore | Supply photos: Nintendo EPD/Nintendo through gamexplore
This gem seems within the Historical Damage containing the Hangin’ on the Roof Street problem, positioned above Reservoir Hills’ tuning fork. Comply with the principle path and also you’ll discover it halfway by way of the extent.
#13: Hidden on the Roof Street

Graphic: Johnny Yu/gamexplore | Supply photos: Nintendo EPD/Nintendo through gamexplore
Earlier than reaching the exit of Hangin’ on the Roof Street, observe the roof path to the left. Punch the shifting stone slabs to open a path to the hidden space on the again, which takes to you to a gem hidden behind a smashable wall.
#14: On the Finish of Roof Street

Graphic: Johnny Yu/gamexplore | Supply photos: Nintendo EPD/Nintendo through gamexplore
Full the Hangin’ on the Roof Street Historical Damage and this gem shall be ready for you on the exit.

Graphic: Johnny Yu/gamexplore | Supply photos: Nintendo EPD/Nintendo through gamexplore
Head to the doorway to the pond space simply behind the Hangin’ on the Roof Street Historical Damage. Earlier than strolling on the bridge, flip round and drop all the way down to a ledge subsequent to the cliff wall. You’ll discover two inexperienced barrels sitting subsequent to a stone wall. Smash by way of that wall to discover a gem inside.
#16: Battle: Swarms among the many Pillars

Graphic: Johnny Yu/gamexplore | Supply photos: Nintendo EPD/Nintendo through gamexplore
Within the space behind the Hangin’ on the Roof Street Historical Damage, hop into the water to discover a cave opening alongside the again wall. Head inside the opening and out the opposite aspect to seek out an Historical Damage. Go inside and defeat 50 Peekaboopoids to get the Banandium Gem.
#17: Comply with the Voided Terrain


1/2Graphic: Johnny Yu/gamexplore | Supply photos: Nintendo EPD/Nintendo through gamexplore
There’s a small opening on the bottom proper earlier than the realm with floating inexperienced pipe. Drop down and also you’ll see a gem shielded by purple materials. Smash by way of the dust wall close to it and observe the purple path on the ground till you attain an object you may open by singing. Punch it to do away with the purple materials and head again to assert your gem.
#18: Fishin’ for Bananas

Graphic: Johnny Yu/gamexplore | Supply photos: Nintendo EPD/Nintendo through gamexplore
Head to the sting of the map behind the floating pipe. In the event you look off of the sting, you’ll see a platform you could drop onto. Land on the paltform and stroll into the cave to discover a couple fishing monkeys and a sunken Banandium Gem. Leap off of their fishing platform and dive punch the sunken gem a couple of instances to retrieve it.
In the event you do that after letting water again into Sublayer 101, the Banandium Gem shall be on dry floor.

Graphic: Johnny Yu/gamexplore | Supply photos: Nintendo EPD/Nintendo through gamexplore
Go to the pond beneath the floating inexperienced pipe construction. You’ll discover a platform with a blue punching bag hooked up to it within the water. Punch it sufficient instances to lift a platform with a gem on it from the middle of the pond.

Graphic: Johnny Yu/gamexplore | Supply photos: Nintendo EPD/Nintendo through gamexplore
Climb to the highest of the floating pipe construction and observe it till you see a gap you may climb into. Head inside to discover a hidden gem.
#21: Shifty Smash: Atop the Pipes

Graphic: Johnny Yu/gamexplore | Supply photos: Nintendo EPD/Nintendo through gamexplore
On high of the pipes, and within the middle of the swirl, is one other shifty triangle. Punch it to begin a timed trial, the place you have to appropriately goal barrel cannon blasts to launch by way of obstacles. Clear all of them in 20 seconds to get this Banandium Gem.
#22: Battle: Wings on the Wobbly Disc

Graphic: Johnny Yu/gamexplore | Supply photos: Nintendo EPD/Nintendo through gamexplore
If you attain the realm with the floating inexperienced pipe, flip left to discover a dust wall. Break the wall and head inside to seek out an Historical Damage. Hop inside and defeat the three Buzzoids to get the gem.
#23: Past the Cloudy Platforms

Graphic: Johnny Yu/gamexplore | Supply photos: Nintendo EPD/Nintendo through gamexplore
From the Historical Damage with the Buzzoids, head to the opposite aspect of the realm with the floating inexperienced pipe and stroll to the sting of the layer. You’ll discover two shifty platforms and a shifting platform with a Banandium Gem on it. Throw any materials on the shifty platforms and stroll throughout to gather your gem.
#24: Blasting for the Banana

Graphic: Johnny Yu/gamexplore | Supply photos: Nintendo EPD/Nintendo through gamexplore
Slightly below Cranky Kong’s floating island, you’ll discover a cave with a steel platform you could dive punch. Dive punch the platform to set off an explosion that’ll reveal a Banandium Gem throughout from you, however watch out of the mines within the water!
Lagoon Layer Sublayer 101 Banandium Gems
We’ve discovered 14 Banandium Gems in Sublayer 101 of the Lagoon Layer.
#26: Landed in Salvager’s Touchdown!

Graphic: Julia Lee/gamexplore | Supply photos: Nintendo EPD/Nintendo through gamexplore
Defeat the Crockoid sub-boss circling the central waterfall of Sublayer 100 and punch the stake. Drop all the way down to Sublayer 101 and the gem shall be there if you land.
#27: Shifty Smash: A Wall Hanging within the Air

Graphic: Julia Lee/gamexplore | Supply photos: Nintendo EPD/Nintendo through gamexplore
When you enter the Sublayer from the waterfall entrance in Sublayer 100, flip round. You’ll see a inexperienced platform with a shifty triangle on it. Chunk bounce over to it or climb as much as the platform and punch the triangle. You’ll have 20 seconds to explode a concrete wall with increase rock, incomes you a gem.
#28: On the Ceiling of the Flooring

Graphic: Julia Lee/gamexplore | Supply photos: Nintendo EPD/Nintendo through gamexplore
When you’ve raised the water stage within the space, swim beneath the village. Now you can attain a gem hanging beneath the Thorn-Choked Conveyor Ruins.
#29: Over the Thorny Path


1/2Graphic: Julia Lee/gamexplore | Supply photos: Nintendo EPD/Nintendo through gamexplore
Head to the Thorn-Choked Conveyor Historical Damage positioned simply previous the Sublayer 101 entrance you entry by dropping down from Sublayer 100’s central waterfall. Comply with the linear path and also you’ll get your first gem halfway by way of the problem.
#30: Into the Thorny Nook

Graphic: Julia Lee/gamexplore | Supply photos: Nintendo EPD/Nintendo through gamexplore
Proceed by way of Thorn-Choked Conveyor, previous the primary gem, till you see a patch within the left wall lined by thorns. Bomb rock your method by way of it to discover a hidden gem.
#31: By the Thorny Partitions

Graphic: Julia Lee/gamexplore | Supply photos: Nintendo EPD/Nintendo through gamexplore
Full Thorn-Choked Conveyor and also you’ll discover the ultimate gem proper on the exit barrel.
#32: The Salvager’s Stash

Graphic: Julia Lee/gamexplore | Supply photos: Nintendo EPD/Nintendo through gamexplore
If you enter the village, look to the correct of the clothes vendor. You’ll see a inexperienced construction. There’s a gap on the aspect of it that may take you to an underground cavern with a gem inside.
#33: Battle: Concrete-Wall Conflict

Graphic: Julia Lee/gamexplore | Supply photos: Nintendo EPD/Nintendo through gamexplore
From the beginning space accessed by dropping down the waterfall gap in Sublayer 100, immedietly go to the left. Go contained in the wreck and combat two Crockoids to get the gem.
#34: Up, Over, and Throughout

Graphic: Julia Lee/gamexplore | Supply photos: Nintendo EPD/Nintendo through gamexplore
After filling up the water by breaking the primary pipe, drop all the way down to the underside of the extent and go to stone platform on the west aspect of the map. Scale the wall and climb throughout the roof street. The gem shall be on the opposite aspect.
#35: Inside the Quick-Rising Grass

Graphic: Julia Lee/gamexplore | Supply photos: Nintendo EPD/Nintendo through gamexplore
After totally filling up the water within the space, head to the yellow mossy island floating below banana #34. You’ll now have the ability to attain a street on the roof. Climb throughout it to achieve a gem.
#36: Hangin’ on Orangu-Dangle Freeway!

Graphic: Julia Lee/gamexplore | Supply photos: Nintendo EPD/Nintendo through gamexplore
Go to the again nook of Sublayer 100 and punch the stake sitting on a cliff, as a part of the sport’s primary story. Leap down the outlet and the gem shall be down beneath if you land in Sublayer 101.
#37: Concrete Wall on the Transferring Flooring

Graphic: Julia Lee/gamexplore | Supply photos: Nintendo EPD/Nintendo through gamexplore
Drop into Sublayer 101 from the Sublayer 100 entrance at Water Tank Hill. Comply with the ceiling path till you attain a platform with a increase rock monster. Flip again in the direction of the ceiling street and also you’ll see a concrete wall that may be blown up. Take a bit off the monster to blow it up, and chunk bounce as much as get contained in the now opened tunnel. There’s one other concrete wall in right here on the aspect, which you’ll toss a increase rock at to disclose a gem.
#38: Outskirts of the Fishing Village

Graphic: Julia Lee/gamexplore | Supply photos: Nintendo EPD/Nintendo through gamexplore
Drop down into Sublayer 101 utilizing the doorway in Reservoir Outskirts in Sublayer 100, on the sting of the map. You’ll drop in entrance of a climable roof that results in a gem.
#39: Crossed to the Kong Elder’s Court docket!

Graphic: Julia Lee/gamexplore | Supply photos: Nintendo EPD/Nintendo through gamexplore
When you get to the Sublayer, observe the principle quest by blowing up two pipes to lift the water stage. That may create a bridge you may stroll throughout to achieve the extent’s elder and a gem.
#40: The Ship Stern’s Snack

Graphic: Julia Lee/gamexplore | Supply photos: Nintendo EPD/Nintendo through gamexplore
If you attain the Elder Court docket, head to the again proper aspect of the delivery container wall. Comply with that edge to the again of the containers and also you’ll discover a gem across the nook atop a platform on the water.
Lagoon Layer Sublayer 102 Banandium Gems
We’ve discovered 5 Banandium Gems present in Sublayer 102 of the Lagoon Layer.
Banandium Gems 40 by way of 50 have been skipped within the assortment. We consider that you simply’ll must progress additional or full the principle story of Donkey Kong Bananza earlier than you’ll find these Banandium Gems.
#51: Dropped into Chimpy Channel!

Graphic: Julia Lee/gamexplore | Supply photos: Nintendo EPD/Nintendo through gamexplore
Full the principle story quest of Sublayer 101, incomes the primary Bananza energy and smashing by way of the delivery container maze. You’ll attain an entrance to Sublayer 102 on the finish and a gem shall be there if you bounce down.


1/2Graphic: Julia Lee/gamexplore | Supply photos: Nintendo EPD/Nintendo through gamexplore
Enter the Historical Damage at first of the realm. Accumulate all of the balloons to finish the problem and spawn a gem again on the entrance.
#53: Atop the Concrete Roof

Graphic: Julia Lee/gamexplore | Supply photos: Nintendo EPD/Nintendo through gamexplore
When inside Lagoon Layer Problem Course 3, climb to the highest of the maze. There’s a gem up there!
#54: Hung from the Ceiling

Graphic: Julia Lee/gamexplore | Supply photos: Nintendo EPD/Nintendo through gamexplore
Upon coming into the maze, head to the correct. You’ll have the ability to climb a wall close to the sting of the maze that may take you as much as a climable ceiling path that ends at a gem.
#55: Shipwrecked Treasure

Graphic: Julia Lee/gamexplore | Supply photos: Nintendo EPD/Nintendo through gamexplore
Stroll to the wall reverse the Historical Damage. Punch by way of it and also you’ll come out to an space with a small ship. There’s a gem inside it.