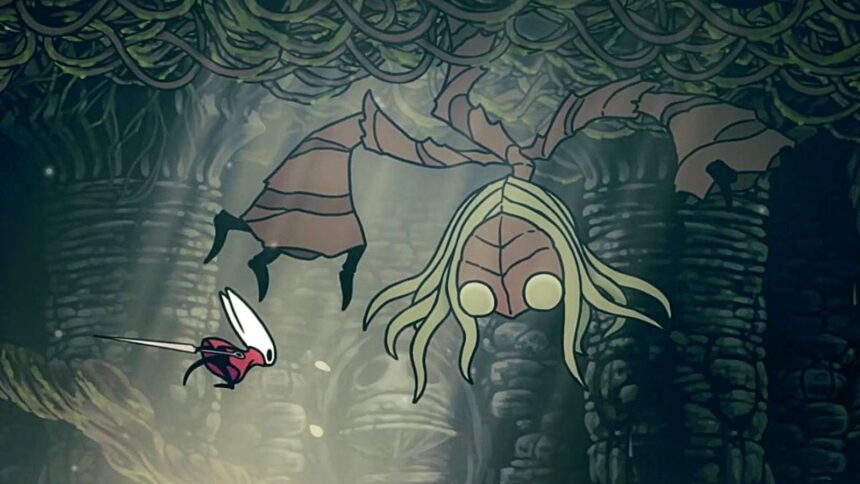
The Sister Splinter boss battle in Hole Knight: Silksong would possibly look much less difficult than some initially. Nonetheless, because it progresses, you’re tasked with managing a number of enemies and obstacles within the enviornment whereas avoiding Sister Splinter and discovering room to launch your individual assaults.
Figuring out what to anticipate is half the battle, so in our Silksong Sister Splinter information, we’ve damaged down Sister Splinter’s moveset, the right way to counter her assaults, and the easiest way to take care of all these minions.
Sister Splinter location in Hole Knight: Silksong

Sister Splinter is on the high of Shellwood, west of Bellhart and east of the Blasted Steps area. Once you enter Shellwood from Bellhart, head left into the open space with water on the backside, and work your approach up through the platforms till you attain the higher left exit. You’ll move a Pollip Coronary heart for the “Ceremony of the Pollip” quest alongside the best way, however you’ll be able to ignore it for now.
The subsequent room has a bench signal, however to get there, it’s a must to drop down into an enviornment battle. Take care of them, then comply with the trail up, ignore the left exit, and spend 80 rosary beads to unlock the primary Shellwood bench.
The trail from right here is linear. Exit to the left, take the elevator down, then exit to the left once more. You’ll discover Shakra within the subsequent room with the Shellwood map for 70 rosary beads. Exit through the left, ignore the left exit within the subsequent room, and climb up. You probably have the required 60 rosary beads, use the top-left exit to enter Shellwood’s bellway and activate it. If not, head proper as an alternative. You may’t do a lot on this room, so comply with the trail proper and up, zoom by the following room, and also you’ll enter the higher parts of the bench room you had been in earlier.
Don’t drop down. Climb up and head proper, after which be sure you activate the elevator earlier than leaving. This creates a everlasting shortcut again to the bench and a way more tolerable runback if it is advisable problem Sister Splinter greater than as soon as. The room to the suitable of the elevator requires you to platform over some white blossoms, after which the room it leads you to is the place Sister Splinter lives.
Sister Splinter’s moveset

Sister Splinter solely has three assaults, however they improve in frequency because the battle progresses.
- Thorn summon: That is Sister Splinter’s most typical assault. She’ll summon two ropes of thorn that stretch from ceiling to flooring. Sister Splinter disappears from view earlier than summoning them, and you’ll spot the place they’ll seem due to a definite inform — rustling spots on the sector’s ceiling. You may (and will) break these thorn ropes with a number of swipes from Hornet’s needle. The thorn rope will break if Sister Splinter’s punch hits it, however don’t depend on that technique, because it isn’t all the time one thing you’ll be able to drive to occur.
- Three-hit punch combo: Sister Splinter’s solely direct assault is a three-hit punch, which she telegraphs with a bit shine element on the fist she’s about to make use of first. The punches are downward and angled within the path Sister Splinter’s fist is pointing in, and the best option to dodge these is to simply get on the opposite aspect so that you don’t get caught accidentally. For instance, if it’s the left fist, transfer to the left of it as an alternative of the suitable.
- Splinterbark summon: Sister Splinter summons two Splinterbark enemies, small, flying bugs that rush towards Hornet in a whirl and harm with their claws. They will deal two masks’ price of harm in the event that they catch Hornet, however when you parry them whereas they spin, the momentum sends them backward and away. Ideally, you’ll defeat the Splinterbark earlier than it will get too shut, however when you get caught between dodging Sister Splinter and unfortunate thorn placement, that is one technique of staying protected. One of the simplest ways to take care of Splinterbarks is to make use of upward assaults whereas they’re nonetheless floating down from the ceiling.

prep for Sister Splinter
You in all probability prepped all you’ll be able to already. The one important factor to have for this battle is the Straight Pins device, as the remainder of the battle simply requires dodging and thoroughly managing all of the summons Sister Splinter provides to the sector. In contrast to the Moorwing battle, there’s nobody else to avoid wasting you this time. Be sure that to relaxation on the bench close to Shakra earlier than beginning the battle, so you can begin nearer to the boss enviornment if it is advisable retry.

The battle begins with Sister Splinter solely utilizing her punch assault and infrequently summoning thorns. You’ll want to leap and assault upward to break Sister Splinter. The most effective time to try this is correct after she repositions and after she finishes her punch combo, as she will’t counter and isn’t doing something dangerous in these moments. Simply be sure you don’t leap too excessive, so that you don’t take harm from touching the boss. Sister Splinter falls to the ground after taking sufficient harm, and you’ve got possibly three seconds to assault as a lot as you’ll be able to.
The primary a part of the battle ends after you deal sufficient harm — often a number of hits after she falls from the ceiling, shocked — and the second begins with Sister Splinter howling to summon two Splinterbark enemies. They float down from the ceiling, and also you received’t have time to defeat each earlier than considered one of them will get near Hornet. Defeat one, then use ranged assaults similar to Silkspear or Straight Pins to take care of the opposite one.

With good timing, you’ll handle to do away with each Splinterbarks earlier than Sister Splinter summons extra thorn ropes and begins punching once more. From right here on (in our expertise), Sister Splinter solely summons one Splinterbark at a time, although the frequency of those summons will increase within the battle’s remaining section. Whereas the Splinterbark remains to be gliding into the sector, assault it from under to do away with it rapidly and switch your focus again to Sister Splinter.
The battle’s remaining section begins with one other howl from Sister Splinter, and whereas her assaults stay the identical, she summons extra thorn ropes extra typically. Proceed clearing ropes and coping with Splinterbarks, attacking Sister Splinter when it’s protected to take action.
Sister Splinter rewards
You aren’t getting something for defeating Sister Splinter. Nonetheless, as soon as she’s gone, you’ll be able to transfer on to get the wall leap capability, which opens many extra avenues for exploration, together with again in Bellhart.