The Tempest Layer is the ninth layer you’ll go to in Donkey Kong Bananza, and like all of the others, it’s filled with Banandium Gems. You’ll have to make use of the Elephant Bananza you get on this layer to seize a ton of them, that are locked behind the brand new mechanic of gulping down harmful terrain sorts.
The Tempest Layer is inhabited by elephant people who find themselves going by some excessive climate situations. There’s lava rain and thunderstorms that you just’ll must courageous by so as to discover your valuable bananas and make it by the extent.
Beneath, we record the place to seek out all the Banandium Gems within the Tempest Layer we’ve discovered to this point in Donkey Kong Bananza. We’re nonetheless updating this information with extra golden bananas as we discover them.
Sublayer 900 Banandium Gems
We’ve discovered 16 Banandium Gems in Sublayer 900 within the Tempest Layer.
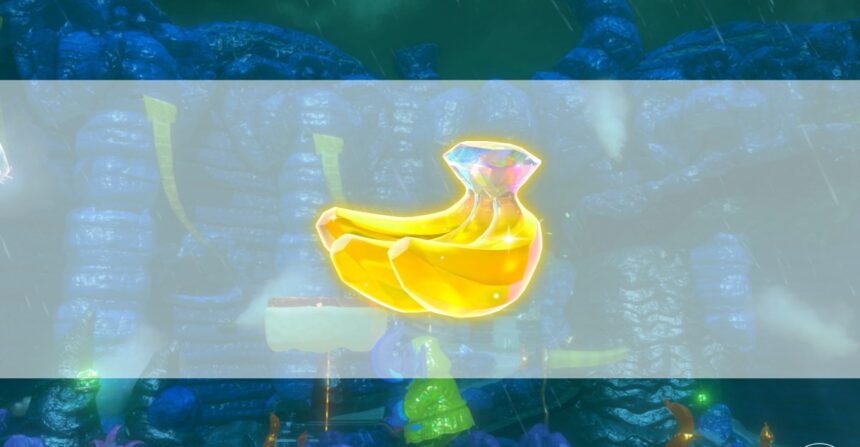
#1: Stormed into the Tempest!

Graphic: Johnny Yu/gamexplore | Supply photographs: Nintendo EPD/Nintendo through gamexplore
After you destroy the massive watermelon within the Resort Layer, drop down into the opening to seek out this bunch of bananas.

Graphic: Julia Lee/gamexplore | Supply photographs: Nintendo EPD/Nintendo through gamexplore
Climb the stone elephant statue to the left of the layer’s entry level, and also you’ll see gold traces indicating paths that floating cloud platforms comply with. Throw terrain on the backside of a platform to decrease it, then use a hand slap to lift it again up once more. (Midair hand slaps gained’t work, so you must truly slap the platform.) The difficult half is that should you decrease the subsequent platform above you earlier than the one you’re presently on rises, the impression of your platform rising will make the subsequent one return up as effectively. One technique to method that is to tear off a number of rock chunks and take them with you as you make your approach up by urgent R to drop them on the platform earlier than you utilize a hand slap to lift it. The platform’s momentum will make the chunks fly into the air, so attempt holding them flat on the floor and never too near the sting. Repeat this technique till you attain the ultimate platform and the banana.
Alternatively, you’ll be able to wait till you purchase the Elephant Bananza powers, then use its chunk-making potential to keep away from having to do any of this. 🙂
#3: Tucked by the Twister

Graphic: Julia Lee/gamexplore | Supply photographs: Nintendo EPD/Nintendo through gamexplore
On the outskirts of Mount Gusty Tusk, on the opposite facet of the wall behind the getaway, there’s an space the place a twister seems and follows you. You can see this Banandium Gem inside a small opening within the wall.

Graphic: Julia Lee/gamexplore | Supply photographs: Nintendo EPD/Nintendo through gamexplore
By breaking the door beside the Warp Gong, you entry a portion of the map on the surface. On the decrease degree, there are two rainbow enemies. Make them get out of the bottom subsequent to the wall, however beneath a line of gold nuggets. Bounce on one in all them and seize a chunk to fly upwards. Inside a gap on the prime, you’ll discover the banana.


1/2Graphic: Julia Lee/gamexplore | Supply photographs: Nintendo EPD/Nintendo through gamexplore
The subsequent three Banandium Gems are within the Liftoff Labyrinth wreck, which, should you’re going through the Elephant Elder in her chamber of the Forecaster Refuge, is to your proper. This primary banana is your reward for making it midway by.

Graphic: Julia Lee/gamexplore | Supply photographs: Nintendo EPD/Nintendo through gamexplore
The wreck’s hidden banana is after the midway level, on the finish of the half the place you seize liftoff ore from sinking pillars. There’s a small opening on the prime proper of the wall on the finish. Sink the final pillar till the liftoff ore is barely above the lava, seize a bit, and instantly begin angling DK towards the wall. You’ll attain the opening and may drop the ore earlier than DK will get close to the lava on the roof.

Picture: Nintendo EPD/Nintendo through gamexplore
You’ll get this banana after finishing Liftoff Labyrinth.
#8: Elephant Elder’s Secret Snack

Graphic: Julia Lee/gamexplore | Supply photographs: Nintendo EPD/Nintendo through gamexplore
Climb the wall behind the Elephant Elder the place there are three cabinets of books. After the third, there’s a gap and a cracked wall. Break it to seek out this banana.

Graphic: Julia Lee/gamexplore | Supply photographs: Nintendo EPD/Nintendo through gamexplore
There’s a Growtone above the room the place the Elephant Elder is situated. You may climb up right here by leaving the the Forecaster Refuge through the exit subsequent to the getaway and simply climbing up the partitions. Feed the Growtone some gold to get this banana.
#10: The Hungry Tempest Growtone
Feed the Growtone extra gold for this second banana.
#11: The Sated Tempest Growtone
Feed the Growtone even extra gold (4,000 complete) to get the third and remaining banana.
#12: Rain-Soaked Roughhousing

Graphic: Julia Lee/gamexplore | Supply photographs: Nintendo EPD/Nintendo through gamexplore
Forward of the place you discover the Growtone, you discover a small area the place there are two enemies. Kill them and the subsequent two waves of enemies that may seem to earn the Banandium Gem.

Graphic: Julia Lee/gamexplore | Supply photographs: Nintendo EPD/Nintendo through gamexplore
Punch by the wall of soppy earth behind the Void Machine you must dismantle to lift the caldera altar. Comply with the tunnel till it dead-ends close to a steel pipe. Punch down, then comply with the trail by some gentle earth partitions till you attain a extra open room the place the banana is.
#14: Tour by the Tunnels

Graphic: Julia Lee/gamexplore | Supply photographs: Nintendo EPD/Nintendo through gamexplore
Punch by the soft-earth wall on the ledge within the room the place you discovered the earlier banana, and comply with the burrowing Fractone by one other sequence of tunnels. It’ll dump you out in a room with two antickoids. Defeat them, then punch by the wall on the left and proceed following the tunnel and soft-earth partitions. On the finish, you’ll see a banana suspended from the roof, and a Fractone congratulating you on making it right here.
#15: The Secret Lava Pocket

Graphic: Julia Lee/gamexplore | Supply photographs: Nintendo EPD/Nintendo through gamexplore
Across the area the place you battle Blusterwing for the primary time, there are two elephant trunk-like buildings releasing lava. Between them, there’s gap blocked by lava. It’s essential to use the Elephant Bananza energy to suck the lava out of the best way and open the passage between the buildings to seek out this banana.
These bananas are skipped on the gathering display, implying that they’re locked as post-game content material. We’ll replace this information with these bananas as soon as we get there.
#24: Tempest Chip Change

Graphic: Julia Lee/gamexplore | Supply photographs: Nintendo EPD/Nintendo through gamexplore
On the Tempest Chip Change store or a getaway concierge, commerce Banandium Chips and gold to obtain a banana. The quantity required is dependent upon how steadily you’ve used the chip change service earlier than.
The Tempest Chip Change store is on Sublayer 901, so should you’re in a rush to do that, you’ll be able to simply the getaway above.
Sublayer 901 Banandium Gems
We’ve discovered 9 Banandium Gems in Sublayer 901 within the Tempest Layer.
#25: Beat Sinister Blusterwing!

Graphic: Julia Lee/gamexplore | Supply photographs: Nintendo EPD/Nintendo through gamexplore
This banana is ready for you at the place to begin of Sublayer 901 after you scare the Blusterwing off in pursuit of the Elephant Elder’s file.
#26: Battle: Revolving-Ring Rumble

Graphic: Julia Lee/gamexplore | Supply photographs: Nintendo EPD/Nintendo through gamexplore
You earn this banana by finishing this battle problem. The doorway for this problem is situated beneath a big umbrella to the fitting of the Lava Getaway. You’ll have to dig within the patch of filth with the flower on prime of it to get to it.
#27: Unbothered by Burrowers

Graphic: Julia Lee/gamexplore | Supply photographs: Nintendo EPD/Nintendo through gamexplore
You’ll find this banana whereas in search of the primary half of the Historical Report. Destroy a void machine that’s subsequent to a tall steel tower and, as soon as the realm is de-voided, go across the tower to seek out this Banandium Gem.
#28: Battle: Iron-Inferno Imbroglio

Graphic: Julia Lee/gamexplore | Supply photographs: Nintendo EPD/Nintendo through gamexplore
Use a chunk of liftoff ore to drift to the small island above the place you destroyed the void machine for the earlier banana. Unseal the wreck, and head inside to face 4 sturdy Squeeloids. Knock them into the lava to defeat them and earn this banana.
#29: Protected from Scalding Showers

Graphic: Julia Lee/gamexplore | Supply photographs: Nintendo EPD/Nintendo through gamexplore
From the highest of the steel tower the place you entered the earlier problem, seize a chunk of rock and throw on the gloo gum portion underneath the platform at different finish of the zip line. Kill the enemies subsequent to you to seize their rock and use it to zipline to the opposite platform. While you land on it, carry out a Hand Slap to interrupt the rock caught beneath the platform, which is able to make it stand up. Go ahead to seek out the banana.
#30: Lava Tub within the Sizzling Bathe

Graphic: Julia Lee/gamexplore | Supply photographs: Nintendo EPD/Nintendo through gamexplore
From the going through the Lava Getaway, go left. There’s a path going downward to an space stuffed with lava. You want the Elephant Bananza energy to take away the lava and discover the Babandium Gem on the finish of the trail.
#31: Piping-Sizzling Platforms


1/2Graphic: Julia Lee/gamexplore | Supply photographs: Nintendo EPD/Nintendo through gamexplore
You may entry this problem course by going to the Historical Report Crossroads, going subsequent to the massive steel tower, and looking out towards the wall beneath. You want the Elephant Bananza energy to enter this problem. After the primary set of rotating platforms, you could find this banana.

Graphic: Julia Lee/gamexplore | Supply photographs: Nintendo EPD/Nintendo through gamexplore
In the course of the above problem course, when within the rotating crosses, go left as an alternative of going straight in direction of the exit barrel. Clear the realm and cross during the last platform to seek out the banana.
#33: Roasting whereas Rotating

Picture: Nintendo EPD/Nintendo through gamexplore
You get this banana proper whenever you attain the tip of the problem course.
Sublayer 902 Banandium Gems
We’ve discovered 37 Banandium Gems in Sublayer 902 within the Tempest Layer.
#34: Beat Sinister Blusterwing! Once more!

Graphic: Johnny Yu/gamexplore | Supply photographs: Nintendo EPD/Nintendo through gamexplore
After you defeat Sinister Blusterwing once more, drop down the pipe to seek out this bunch of bananas.
#35: Taunting behind the Faucet

Graphic: Johnny Yu/gamexplore | Supply photographs: Nintendo EPD/Nintendo through gamexplore
From the Trunk-Dunk Sizzling Springs waypoint, flip to the fitting a big steel elephant face on the wall. When you take a look at its trunk, you’ll see that lava is obstructing its spout. Rework into your elephant type and suck away the lava to permit water to drop down. Swim over to the banana beneath the elephant head and break the banana by punching upwards.
#36: A View of Zip-Line Valley


1/2Graphic: Julia Lee/gamexplore | Supply photographs: Nintendo EPD/Nintendo through gamexplore
Pay the Constructone 1,000 gold to open up the Zip-Line Valley Historical Ruins.
Earlier than you head down the primary zipline, take out a close-by antickoid, and seize the rock it drops. Flip round and climb up the wall above the entryway, whereas nonetheless holding the rock. When you’re on the prime, you’ll see a zipline you’ll be able to slide down utilizing mentioned rock. (You can not use the filth on the prime, it’s not robust sufficient. Belief us.)
#37: Zipping Via the Ruins

Picture: Nintendo EPD/Nintendo through gamexplore
That is the second banana within the Zip-Line Valley Problem Course, and also you’ll run into it as you full the extent naturally.
#38: Zips, Hops, and Swaps

Picture: Nintendo EPD/Nintendo through gamexplore
This banana is simply sitting on the finish of the course earlier than the exit, as traditional with these kinds of Problem Course bananas.
#39: Tempest Smashin’ Stats

Graphic: Johnny Yu/gamexplore | Supply photographs: Nintendo EPD/Nintendo through gamexplore
Teeleport to the Jumbo Spa tuning fork and switch to the left to identify Smashintune beside two elephants chilling in an elephant trunk product of lava. When you’ve destroyed 70,000 cubic meters of lava, you’ll obtain a banana.
#40: Sitting above the Sauna

Graphic: Johnny Yu/gamexplore | Supply photographs: Nintendo EPD/Nintendo through gamexplore
This banana is discovered above the Smashintone within the Jumbo Spa. To succeed in this banana, flip into an elephant and suck up the close by lava to disclose a climbable wall behind it. Climb up the wall and punch upwards to interrupt a gap within the flooring till you will get on the platform with the banana. Swing away to assert it.
When you’ve upgraded your elephant powers, your suction energy would possibly suck up the ground underneath the banana as effectively, so watch out the place you’re aiming!
#41: Tempest Cover and Search
1/3Graphic: Julia Lee/gamexplore | Supply photographs: Nintendo EPD/Nintendo through gamexplore
Converse to the Fractone subsequent to the lava sauna to get a obscure thought of the place the 4 hidden Fractones are.
One is roofed in lava subsequent to the gamemaster. The second is in a distinct segment in a pillar throughout from the Jumbo Spa tuning fork. One other is masquerading as an ember in a brazier behind the Jumbo Spa tuning fork, and the final is in the fitting nostril of a stone elephant statue throughout from the sublayer’s entry level. You’ll want to make use of the Elephant Bananza’s suction energy to “discover” the 2 Fractones lined in lava.
#42: Cranky’s Tempest Rant

Graphic: Johnny Yu/gamexplore | Supply photographs: Nintendo EPD/Nintendo through gamexplore
After you teeleport to the Trunk-Dunk Sizzling Springs, flip to the left to identify an entryway that leads outdoors of the spa. Head outdoors to seek out Cranky Kong sitting on a resort chair. Work together with him and take heed to his rant to get a banana.
#43: Shifty Smash: Scorching Sauna

Graphic: Julia Lee/gamexplore | Supply photographs: Nintendo EPD/Nintendo through gamexplore
Punch the shifty triangle subsequent to the Sauna Getaway after which use Elephant Bananza to finish the problem by sucking up all the spawned terrain.
#44: Taking within the Stormy Surroundings

Graphic: Johnny Yu/gamexplore | Supply photographs: Nintendo EPD/Nintendo through gamexplore
On the higher degree of the preliminary space in Sublayer 902, you’ll discover a set of three platforms. You may chunk soar onto the primary platform, however the different two appear unimaginable to succeed in. Rework into your elephant type and suck up sufficient materials till you have got not less than three chunks in retailer. You’ll have to chunk soar as much as every platform utilizing your saved chunks, which you’ll be able to deliver out by tapping the ZR button. On the prime, you’ll discover a banana.
#45: Battle: Elevator Encounter

Graphic: Johnny Yu/gamexplore | Supply photographs: Nintendo EPD/Nintendo through gamexplore
Earlier than you trip the primary zipline out of the Jumbo Spa, hop down and stroll round the fitting nook to seek out the doorway to the battle problem. Defeat the eight antickoids inside by lifting and dropping the goo glue platforms.
#46: Caught within the Elephant Snout

Graphic: Julia Lee/gamexplore | Supply photographs: Nintendo EPD/Nintendo through gamexplore
This banana is protruding of the stone elephant’s left nostril, like a nasty booger… Climb up the elephant from both contained in the spa or from the surface to nab this banana.

Graphic: Julia Lee/gamexplore | Supply photographs: Nintendo EPD/Nintendo through gamexplore
Use a mix of DK’s Hand Slap with Elephant Bananza’s inhaling to eliminate the lava and scout out this banana that’s buried beneath. Watch out as you navigate round this maze, because the digital camera angles can get form of wonky.
#48: Shifty Smash: Stairs within the Storm

Graphic: Julia Lee/gamexplore | Supply photographs: Nintendo EPD/Nintendo through gamexplore
Hit the shifty triangle after which use Elephant Bananza to inhale the closests “steps” after which create chunks to throw on the ones out of attain to get this banana.
#49: Crossing the Lava Street


1/2Graphic: Julia Lee/gamexplore | Supply photographs: Nintendo EPD/Nintendo through gamexplore
This banana is without doubt one of the rewards you’ll see as you full the Problem Course Sizzling-Lava Hotfoot, situated immediately above the Cliff-Edge Getaway. This one is skippable, however you’ll be capable to see it on the facet. Simply keep in mind to make use of your Elephant Bananza to suck up the lava to clear the trail you took to this banana so you’ll be able to proceed on the observe to the tip of the extent unscathed.

Picture: Nintendo EPD/Nintendo through gamexplore
When you used the Elephant Bananza to suck up the lava as talked about as a part of the above banana, you should utilize your powers to create a bit to Chunk Bounce up on this platform to succeed in this banana. You too can get awkwardly pushed up right here if the lava touches DK and he leaps in ache. (Do we all know this from expertise? Possibly so.)
#51: Finish of the Lava Street

Picture: Nintendo EPD/Nintendo through gamexplore
This banana is simply on the trail on the finish of the Sizzling-Lava Hotfoot Problem Course proper by the exit.
#52: Scorching, Surprising Scaffolds

Graphic: Julia Lee/gamexplore | Supply photographs: Nintendo EPD/Nintendo through gamexplore
As you cross this lava-stricken path throughout the principle story, should you comply with the left path as an alternative of going straight, you’ll discover this banana underneath some lava. It is best to already be in Elephant Bananza mode to suck the lava up off this path, so simply proceed sucking it up till the banana is unearthed.

Graphic: Julia Lee/gamexplore | Supply photographs: Nintendo EPD/Nintendo through gamexplore
This banana is protruding of the wall by the Massive-Roof Shelter tuning fork.
#54: Banana within the Mud Tub

Graphic: Julia Lee/gamexplore | Supply photographs: Nintendo EPD/Nintendo through gamexplore
When you use DK’s Hand Slap, it is best to be capable to see this banana underground forward of the Massive-Roof Shelter tuning fork. Dig straight down in entrance of the close by signal to drop on this banana underground.
#55: Among the many Rocky Elephants

Graphic: Julia Lee/gamexplore | Supply photographs: Nintendo EPD/Nintendo through gamexplore
Climb up the stone elephants above the Massive-Roof Shelter and dig straight down from the spot underneath the umbrella with the flower on it to seek out this banana in a cave.
#56: Battle: Floor-Gulping Glory

Graphic: Julia Lee/gamexplore | Supply photographs: Nintendo EPD/Nintendo through gamexplore
Use your Elephant Bananza and whole this fight problem. Suck up the bottom beneath the three crockoids to make them fall and die like a Looney Tunes character to assert your banana.
#57: Tempest Fragmentone Restoration


1/2Graphic: Julia Lee/gamexplore | Supply photographs: Nintendo EPD/Nintendo through gamexplore
Assist the Fragmentone get one fragment again to get this banana.
This Fragmentone banana requires a bit extra persistence than the others, although the fragments themselves aren’t in a hard-to-find place. Suck up the lava utilizing Elephant Bananza and thoroughly escort the fragments on the steel bridge, being aware of the thunderbolts coming down. The lightning will go away circles on the steel floor that the fragments can not contact with out dying, so be very affected person and watch for them to vanish earlier than continuing.
#58: Tempest Fragmentone Restoration
Convey two extra fragments again to the Fragmentone (so that you’ve introduced again all three) to get this banana.
#59: Secret by the Shelter

Graphic: Julia Lee/gamexplore | Supply photographs: Nintendo EPD/Nintendo through gamexplore
Thie banana is in a blocked cave previous the 2 gooey platforms close to the Massive-Roof Shelter tuning fork. You may see it behind the cavern entrance should you use your Hand Slap potential. Break the wall open throughout the best way to seize it.
#60: Battle: Strike like Lightning

Graphic: Julia Lee/gamexplore | Supply photographs: Nintendo EPD/Nintendo through gamexplore
Climb down the wall on the facet by the 2 crockoids close to the tower previous the Massive-Roof Shelter tuning fork. Enter this fight problem and take out 5 rolluskoids for the banana.
#61: Midway to the Station

Graphic: Julia Lee/gamexplore | Supply photographs: Nintendo EPD/Nintendo through gamexplore
This can be a banana you’ll run into as you progress by the story, on the prime of the tower after you go to the Massive-Roof Shelter.
#62: Battle: Zip-Line Zones

Graphic: Julia Lee/gamexplore | Supply photographs: Nintendo EPD/Nintendo through gamexplore
Pay the Constructone 600 gold to take away the boulder blocking this fight problem. Defeat the 2 crockoids inside for this banana.
#63: Hid within the Sky

Graphic: Julia Lee/gamexplore | Supply photographs: Nintendo EPD/Nintendo through gamexplore
Pay the Constructone 100 gold so as to add a zipline right here and trip the zipline down. Bounce off to land on the tiny island forward to get a banana.


1/2Graphic: Julia Lee/gamexplore | Supply photographs: Nintendo EPD/Nintendo through gamexplore
That is the primary banana you’ll get simply by going by the Sharpshooter Scramble Historical Ruins, underneath the Clifftop Shelter.
#65: Sniper-Free Protected Spot

Picture: Nintendo EPD/Nintendo through gamexplore
To seize this banana, proceed on the trail proper as an alternative of going up. Don’t fear — you gained’t must backtrack after you seize the banana, as a barrel will fireplace you again to the fork within the street.
#66: Scramble by the Snipers

Picture: Nintendo EPD/Nintendo through gamexplore
That is the ultimate banana you’ll get proper earlier than the exit barrel for the Sharpshooter Scramble problem.

Graphic: Julia Lee/gamexplore | Supply photographs: Nintendo EPD/Nintendo through gamexplore
This banana is underneath the water. Dive punch down from the close by cliff to smash it.
#68: Shifty Smash: Stormy Skies

Graphic: Julia Lee/gamexplore | Supply photographs: Nintendo EPD/Nintendo through gamexplore
Break the shifty triangle to start out the problem and climb up on prime of the liftoff ore. Choose up a bit to fly up and break the metallic blocks on the prime to earn your banana.
#69: In a Floating Puddle

Graphic: Julia Lee/gamexplore | Supply photographs: Nintendo EPD/Nintendo through gamexplore
Seize a bit of liftoff ore by the zipline to drift as much as the island with this banana on it.

Graphic: Julia Lee/gamexplore | Supply photographs: Nintendo EPD/Nintendo through gamexplore
Because the identify suggests, this banana is simply sitting on prime of the Stormy Station dome roof. Climb up there to seize it.
Monkeying round in Donkey Kong Bananaza? We have now guides that will help you plow by this collectathon, together with the place to seek out Banandium Gems on the Forest Layer, The Junction Layer, and Resort Layer. We even have guides on the way to use amiibos and explainers on the varied Historical Bananza Powers and the talent tree.